Introduction
Lifting a hot water heater safely requires meticulous planning, precise technique, and adherence to safety codes. Typical residential storage water heaters weigh between 125 and 175 pounds when empty, increasing by over 300 pounds when filled with water and internal components removed. Incorrect handling can lead to serious musculoskeletal injuries, damaged connections, and compromised installation integrity.
This guide covers every aspect—from safety requirements and tool selection to step-by-step lifting methods, comparisons of techniques, and troubleshooting common problems—ensuring an informed and risk-mitigated operation.
Safety Standards and Code Requirements
Gas water heaters installed in garages must be elevated at least 18 inches above the floor to prevent ignition of flammable vapors and comply with building codes.
Before lifting, always isolate power: turn off the circuit breaker for electric heaters or close the main gas valve for gas units. Depressurize the system by shutting the cold-water inlet valve and opening a nearby hot tap.
Personal protective equipment should include safety glasses, cut-resistant gloves, and steel-toe footwear. If working in confined spaces, ensure adequate ventilation and maintain clear egress paths at all times.
Tools and Equipment
Gather the following tools and supplies to streamline lifting and minimize injury risk:
-
Adjustable wrench, channel-lock pliers, screwdrivers for disconnecting plumbing and gas lines
-
Garden hose for draining water away from work area
-
Furniture sliders or pads to protect flooring
-
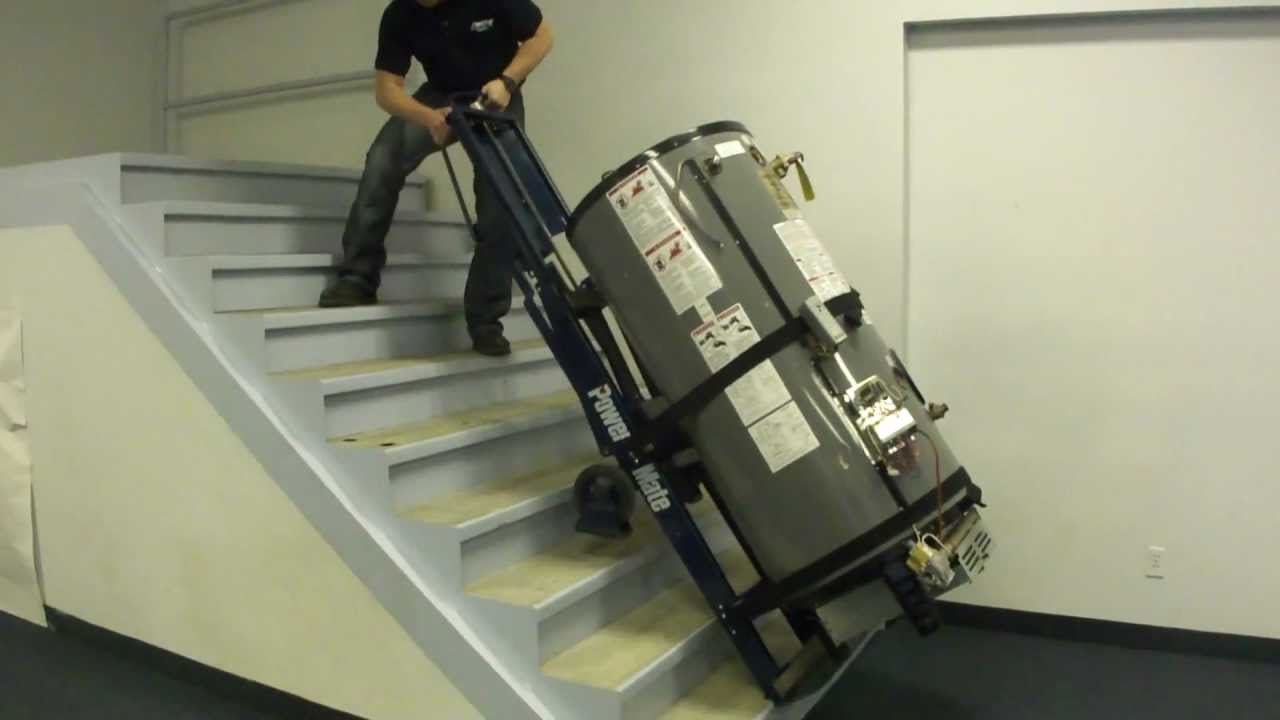
Hand truck (dolly) rated for ≥400 lbs load and heavy-duty ratchet straps
-
Portable ramp (for elevation changes) and water-heater-specific lifting straps or magnetic handles
-
Drip pan to catch residual leaks during transport
-
Concrete or steel platform compliant with local plumbing codes
Ensuring each tool is in good condition and rated suitably for the heater’s weight is critical to a safe, efficient lift.
Pre-Lift Preparations
-
Power and Supply Isolation
-
For electric units, switch off the breaker. For gas units, shut the gas valve at both the heater and meter.
-
Close the cold-water inlet valve.
-
-
Drain the Tank
-
Attach a garden hose to the drain valve and route it to a safe discharge point.
-
Open the nearest hot-water faucet to allow air into the tank, then open the drain valve until water flow stops.
-
-
Disconnect Utilities
-
Loosen and separate the hot and cold water connections.
-
Detach gas lines (using proper fittings) or electrical wiring, capping them per code.
-
Remove any vent or exhaust piping, keeping components organized for reassembly.
-
Lifting Techniques and Procedures
Method 1: Two-Person Manual Lift
-
Team Positioning
-
Two trained individuals squat with backs straight, gripping opposite sides of the heater’s lower body.
-
-
Synchronized Lift
-
Rise by driving through the legs, keeping the heater close to the torso.
-
-
Transfer
-
Communicate movements clearly, walking the heater onto a stand or dolly base.
-
This method avoids specialized equipment but risks fatigue and spinal strain if attempted over stairs or long distances.
Method 2: Ramp and Dolly
-
Setup
-
Position ramp securely against the floor and target elevation (e.g., entrance threshold).
-
-
Initial Tilt
-
One person tilts the heater backward by its top water-connection fittings; the second guides its descent.
-
-
Dolly Engagement
-
Roll the dolly under the offset center of gravity, then ratchet-strap the heater to the dolly frame.
-
-
Transport
-
Push the strapped dolly slowly, maintaining control over the load’s balance.
-
This technique leverages gravity and reduces lifting effort, particularly useful for single-person operations.
Method 3: Lifting Straps and Magnetic Handles
-
Attachment
-
Affix magnetic lifting handles at factory-approved locations on the heater shell.
-
-
Strapping
-
Loop ratchet straps through handles and secure to the dolly or rig.
-
-
Hoisting
-
Tighten straps progressively to lift the heater off its stand; then slide in a dolly beneath using sliders.
-
Specialized lifting systems allow one operator to raise a 200 lb heater safely but require investment in proprietary hardware.
Comparison of Lifting Methods
| Technique | Equipment Needed | Advantages | Limitations |
|---|---|---|---|
| Two-Person Manual | None | No extra gear, direct control | High injury risk, not for stairs |
| Ramp and Dolly | Ramp, dolly, straps | Reduces lifting force, single user | Requires sturdy ramp, space for setup |
| Lifting Straps & Magnetic | Magnetic handles, rig, straps | Minimal manpower, precise control | Higher cost, specialized gear |
Installation and Reconnection
-
Position on Platform
-
Center heater on a level, code-approved pad (concrete or steel).
-
-
Reattach Plumbing and Gas/Electrical Lines
-
Use new Teflon tape or approved sealant on threaded joints; tighten to manufacturer torque specs.
-
-
Install Drip Pan and Temperature-Pressure Relief Valve Extension
-
Ensure discharge pipe falls within 6 inches of floor level per code.
-
-
System Testing
-
Open cold-water inlet, purge air via open faucets.
-
For gas heaters, apply soapy water to gas joints and pressurize to check for leaks.
-
Energize unit and monitor warm-up, verifying correct operation and safety-valve function.
-
Troubleshooting Common Issues
-
Incomplete Drainage: Inspect valve obstruction; replace corroded drain valve.
-
Utility Connection Leaks: Re-thread joints, apply fresh sealant, and retighten.
-
Dolly Instability: Reposition straps, ensure load is centered, and use edge guides on dolly.
-
Ramp Slippage: Increase ramp contact area, add non-slip mat underneath, or secure ramp ends.
Ergonomic and Physics Considerations
Employing mechanical advantage principles reduces required effort. For a ramp, the theoretical force (F) needed satisfies $$F = \frac{W \times h}{L}$$ where W is the heater weight, h is elevation change, and L is ramp length. A gentler slope (larger L) decreases F, easing single-person transport.
Maintain a neutral spine; lift by extending hips and knees. Avoid trunk rotation during load transfer to prevent shear forces on lumbar discs.
Best Practices and Tips
-
Always inspect equipment capacity before each use.
-
Pre-assemble a path free of obstructions and level changes.
-
Use a drip pan under the heater during reconnection to capture residual water.
-
Keep a cordless work light on hand for visibility in tight spaces.
-
If uncertain, enlist a licensed plumber or HVAC technician to ensure code compliance and personal safety.
Conclusion
Lifting a hot water heater is a multifaceted task demanding respect for safety protocols, proper equipment, and ergonomic technique. By following this comprehensive guide—covering code requirements, step-by-step methods, tool selection, and troubleshooting—you can execute the job confidently and without injury.
For large or complex installations, consulting a professional remains the best course to guarantee compliance and long-term reliability.
QTE Technologies is an international MRO provider proudly serving customers in over 180 countries. Established in 2010, we supply over 1 million products across every industry and technology. Additionally, you can reach us anytime via 24×7 chat support, phone, WhatsApp or email. Discover what our valued customers have to say about our services on our dedicated review page.
Post Author By QTE Technologies Editorial Staff (with a solid background in both technical and creative writing - accumulated 15+ years of experience).